Friday, November 6, 2015

Edward Gorey Halloween: How to make a paper mache hat mask

For Halloween this year I decided to be Edward Gorey's character Mr. Earbrass from the Unstrung Harp. 

Gorey has such a unique visual style that I didn't want to simply paint my face and wear fancy clothes. I decided that the best option was a paper mache mask worn as a hat over my head. Here is a sketch I did to see what that might look like.


First I cut out a scale profile of the head so I would have an idea of the size, and to make sure it would fit over a regular baseball cap which I planned to use for the interior. If you look closely at the drawing you can see the outline of the baseball hat. I used a cheap craft hat that I bought at Michael's for three bucks. 


I didn't get a picture of the hat before I started sculpting over it, but I cut out cardboard forms and taped them to the hat to use as guides for the overall shape that I wanted to end up with. I don't have a head mold (this is my first mask like this) so I used a sugar jar and taped a paper bag stuffed with plastic bags over it to get roughly the same shape as my melon. Then I just started adding newspaper and tape until I had the shape I was looking for. It's a good idea to put masking tape over the whole surface because once you're done molding over it it makes it much easier to pull out your armature. 


I started this only a couple of days before Halloween so I didn't really have enough time to use paper mache (lots of dry time involved). I've had these plaster gauze strips lying around for a while so it seemed like a good opportunity to try them out since they dry so much faster. It's the same material arm and leg casts are made from so once you have two or three layers on there your shell will be pretty strong. For the eyes I just cut a ping pong ball in half (just like Kermit the frog) and I decided not to cover them in plaster strips to keep their smooth texture. The ears I created separately and added on later. 


I was a little disappointed with how textured and uneven the final product was due to how thick the plaster strips were, but I was able to soften the edges a little bit using painters caulk. After painting on a couple of layers of gesso the only thing left to do was draw on the features to resemble the original crosshatched illustration. I also put a layer of clear gloss medium over the eyes to make them shiny, as a finishing touch. Below you can see the finished mask next to the initial armature. 


And here's the costume in full effect!


I didn't have a fur lined coat, so we pinned a strip of fake fur my wife has to the collar of my trench coat. Worked like a dream. Of course the one real downside of this costume is that hardly anyone will know what you are, but who cares! Right? Happy Halloween!


Thursday, July 16, 2015

Giant Insects in PDX!

"Woman and Child"
I'm terribly tardy in posting about this, but I it's not every day that one has an art show up at Paxton Gate, so I should probably tell you about it. 

When I was living in San Francisco eight years ago Paxton Gate was my favorite store to visit. On a rare sunny day I'd travel by myself to the Mission, and between lazing at Dolores Park and getting toasted banana ice cream at Bi-Rite Creamery, I'd wander into Paxton Gate and marvel at their collection. Taxidermied animals littered the walls while the rest of the store was stuffed to the gills with gems, minerals, skeletons, insects and arachnids in frames, and mammalian glass eye replicas in large glass cases. It was a store that held so much of what I loved as a child, but had inexplicably forgotten. It inspired stories of mystery and wonder. 

Needless to say, I was excited when one opened in Portland in 2010. Located on N. Mississippi Ave. Paxton Gate PDX brings the spirit of the San Francisco location to the Pacific Northwest. I've been admiring their collection for years, so I was pretty excited when they agreed to show my work last month. Two summers ago I created several pieces that combined vintage cabinet cards and giant insects. I wanted to expand on this series, but wanted a venue first and Paxton Gate seemed like a great fit. Here's some information on the show:

Family Portraits is an ongoing series that questions humanity's place as the dominant species and explores the relationship between humans and animals by depicting what the world might look like if we were replaced, or lived alongside different creatures from the animal kingdom.
In this incarnation:  Through the lens of a portrait photographer at the end of the 19th century we are introduced to an alternate world where insects have grown to mammoth proportions and strange human/insect hybrids pose with poise. All pieces are painted with ink on wood panels and are based on authentic 19th century cabinet cards.
Unfortunately the show will only be up for a few more days (I think it comes down the 17th) but they'll be holding onto a couple of the pieces as well as some of the prints that are available for another month. All pieces will be featured on my website and prints will be made available through my Etsy store. For information on purchasing the original paintings please contact me at beardedmaladies@gmail.com.

I think it's important to note that all products at Paxton Gate are purchased through responsible sources and that taxidermied animals are vintage and bought through trade shows and estate sales. No animals are being specifically killed for taxidermy and sold at this store. I do have conflicting feelings about the fetishization of animals through taxidermy and animals used as decoration, but that is perhaps a topic for a different blog post. I'd be happy to hear your thoughts on the matter if you'd like to leave a comment.


 Here are some photos of the show


Saturday, March 28, 2015

A Lizard in a Sweater Holding a Banner


I haven't posted on this blog much lately, but I thought this piece warranted a post. This was a birthday illustration that I'm hoping to alter slightly and turn into a greeting card one day. I tried a slightly different approach with this one, using pencil for the outline instead of pen, combined with watercolor, to get a softer look. I'm happy with the way it turned out, but I think I still need to do some tinkering with the technique. I also did this drawing without looking at reference photos which gives it a slightly more illustrative and less realistic feel. 

Since the last time I posted here I've started making greeting cards with my work on it, including several Bill Murray pieces that I made for a Bill Murray themed show at Good: A Gallery here in Portland on N. Mississippi and N. Skidmore. All my new cards and prints are available at my Etsy shop, and if you happen to live in Portland you can buy them in person at Flutter on Mississippi St. (When you're there please give their store cat "King" a good head scratching for me!)

My cards are also being sold at Skylight Books in Los Angeles and Elliot Bay Book Store in Seattle, which is very exciting for me. Even though I haven't posted here in a while that doesn't mean I haven't been drawing! I'm always uploading stuff to my Instagram feed (beardedmaladies) and to my Facebook page. Sorry for all the self promotion but I've got a lot to update you guys on! I have a show coming up in June at Paxton Gate here in Portland which will be an extension of my Insect series I did back in September of 2013. I've been having fun working on new bug paintings and I'm looking forward to sharing them on here soon. Okay, is that all? I think that's all. Bye!

Wednesday, October 15, 2014

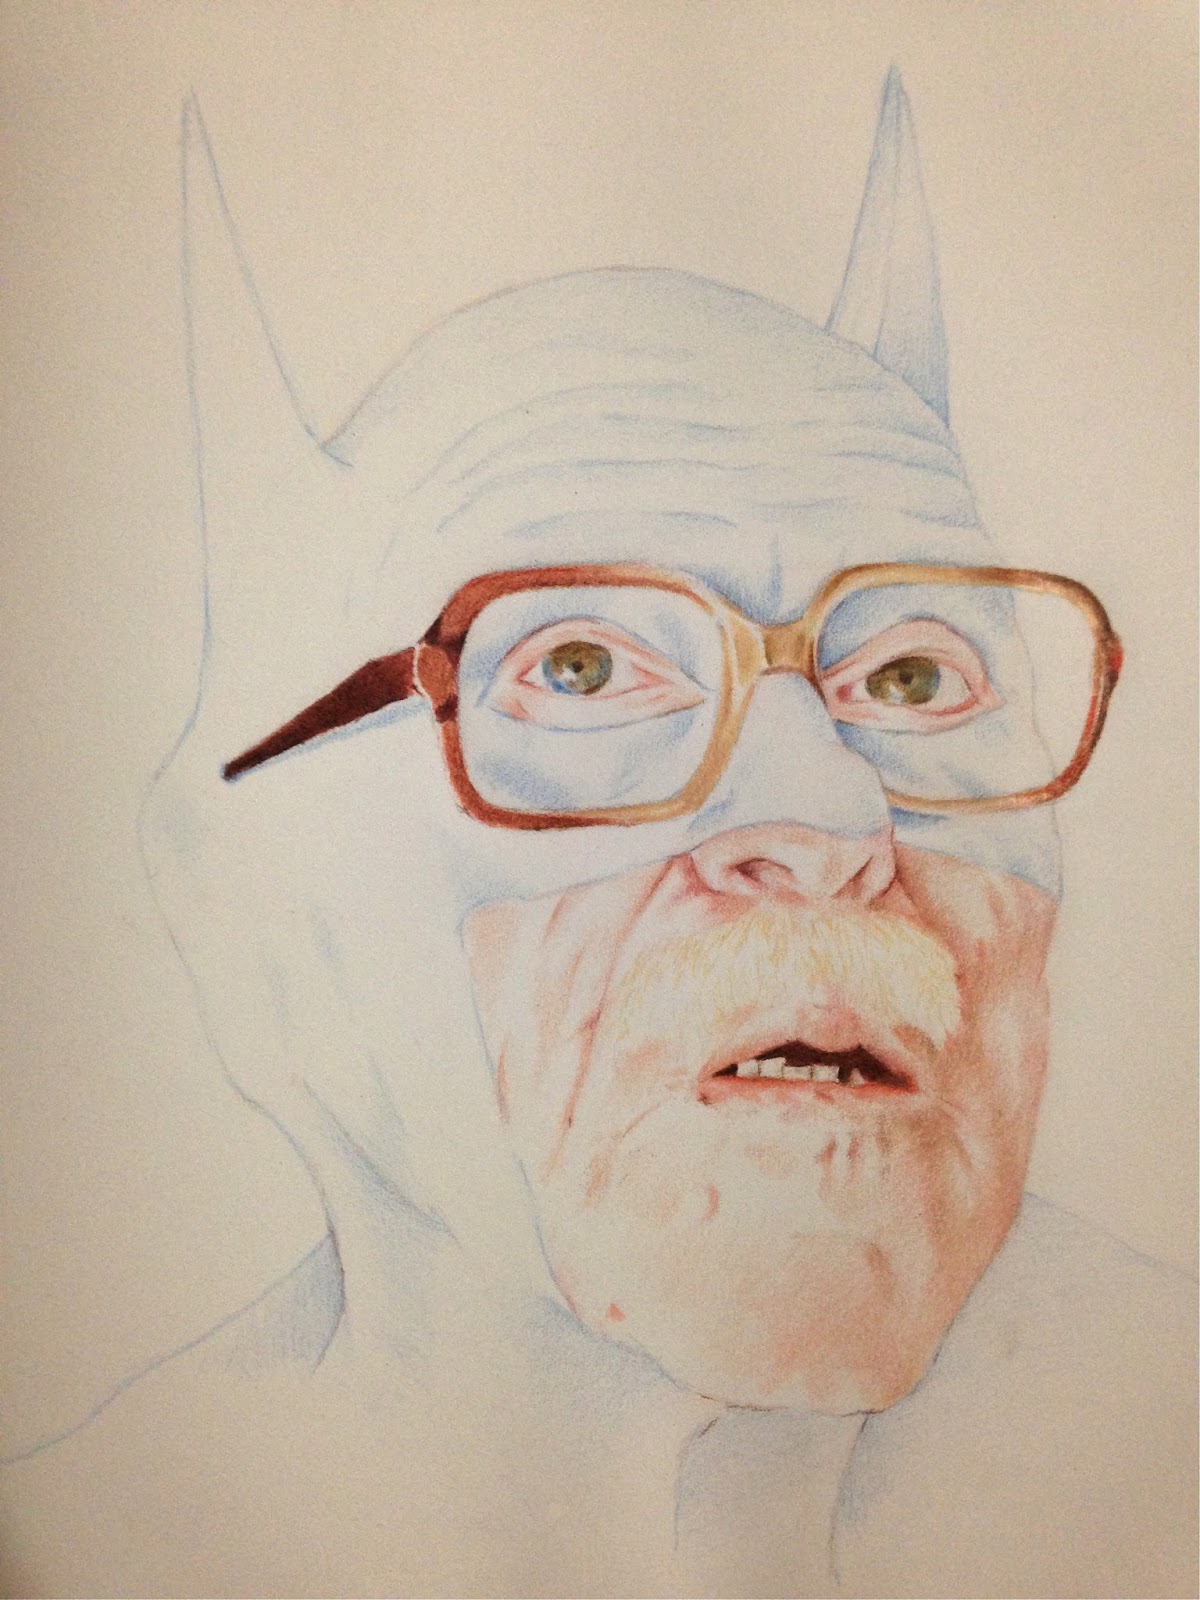
Bat Gramps


Wow, it's been quite a while since I posted an actual drawing on this blog. So long, infact, that I bet you thought I had given up on it. Not true! I've been drawing up a storm and here's a picture to prove it. As a companion piece to last years "Darth Paul" I decided to draw my grandfather as none other than the caped crusader himself! I still have a little more work to do on this one, but I thought it was finished enough to share with you guys. I'm planning to continue this series just as soon as I think up some more characters for my grandfather to be. 

If you have any suggestions let me know in the comments!

Monday, September 22, 2014

Bustin' Loose

Going into this class I was probably most excited about learning how to sculpt a bust. As a fan of portraiture I'm quite drawn to busts and always saw it as a natural progression for my own work.

As usual we spent an entire 5 hour session working from a live model for this piece, but I spent most of my time working on it at home from digital images taken during the session. Here are a few photos of the bust pre-firing.

They all start bald like a baby

Getting there

Here's the finished version next to his doppelgangers, waiting to be fired


Side view

This piece is a good example of how over glazing can ruin a piece. I wanted this piece to turn out well so badly that I spent too much time fussing with the glazes, instead of performing careful glaze tests prior to the final glazing. The end result was a muddied mess.


It wasn't a total disaster, but I wish I had put as much care into glazing the piece as I did in sculpting it. Oh well, lesson learned. Hopefully this will just be the first bust of many. 


Sunday, August 31, 2014

Back to the Figure


This is one of the first finished sculptures I produced in the class. I think it may have been from our second session. We worked on this pose for around five hours in total from a live model. As you can see the left arm broke off when it was fired and I had to reattach it with gorilla glue, but I have to admit that I do like the character that the crack brings to the figure. Surprisingly this is one of my most successfully glazed pieces. I used a red iron stain on the figure which I then wiped off so it would only remain in the indentations. 


I was a little more successful in defining the back of the figure than the front. At this point we hadn't had a lot of practice working on faces, so you can see that mine is a bit out of proportion and less defined. As are the hands and feet. The model was incredibly skinny, which provided a lot of good musculature and bone indentation to define. When it comes to drawing and sculpting people I always prefer bodies that are a little more extreme. Skinnier, heavier, wrinkled. They just make for more interesting subjects. Beautiful people are just a bit more boring to render, in my opinion. 


It's interesting to me how the mood of the sculpture changes depending on which direction you look at it. Which viewpoint do you like the most out of the top three?

Friday, August 29, 2014

Heads II


I think my second attempt was a great improvement on the first. Though, as you can see, I still need to work on my glazing skills. The proportions and features are much better defined in these, and I added a neckline and the beginning of shoulders which really help to visualize the rest of the figure. Ears also do a lot to contribute to believability, as well as hair and eyebrows as seen in the figure below. These were the only pieces that I did without a model in front of me, so next time I'll post some full bodied figures from live modeling sessions.